
Choose the MP3 bitrate
Bitrate controls how much data the MP3 encoder uses. More data can preserve more detail, but only when that detail exists in the source. Speech usually needs less storage than dense music. Compare a short section on the headphones or speakers you will actually use.
Avoid converting the same MP3 repeatedly. Each lossy encode can discard more information. If you need several versions, create each one from the original video rather than using yesterday's MP3 as the next input.
Save the MP3 in a separate folder
Use an output folder named for the project, class or recording date. The application creates a new audio file; it does not need to replace the video. Before removing anything, check both the exported duration and a few points inside the recording.
An MP3 export contains sound rather than the video picture. Subtitles, slides and visual instructions will therefore be absent. Keep a video copy when those elements are necessary to understand the recording.
Step-By-Step Instructions
- 1
Load the video
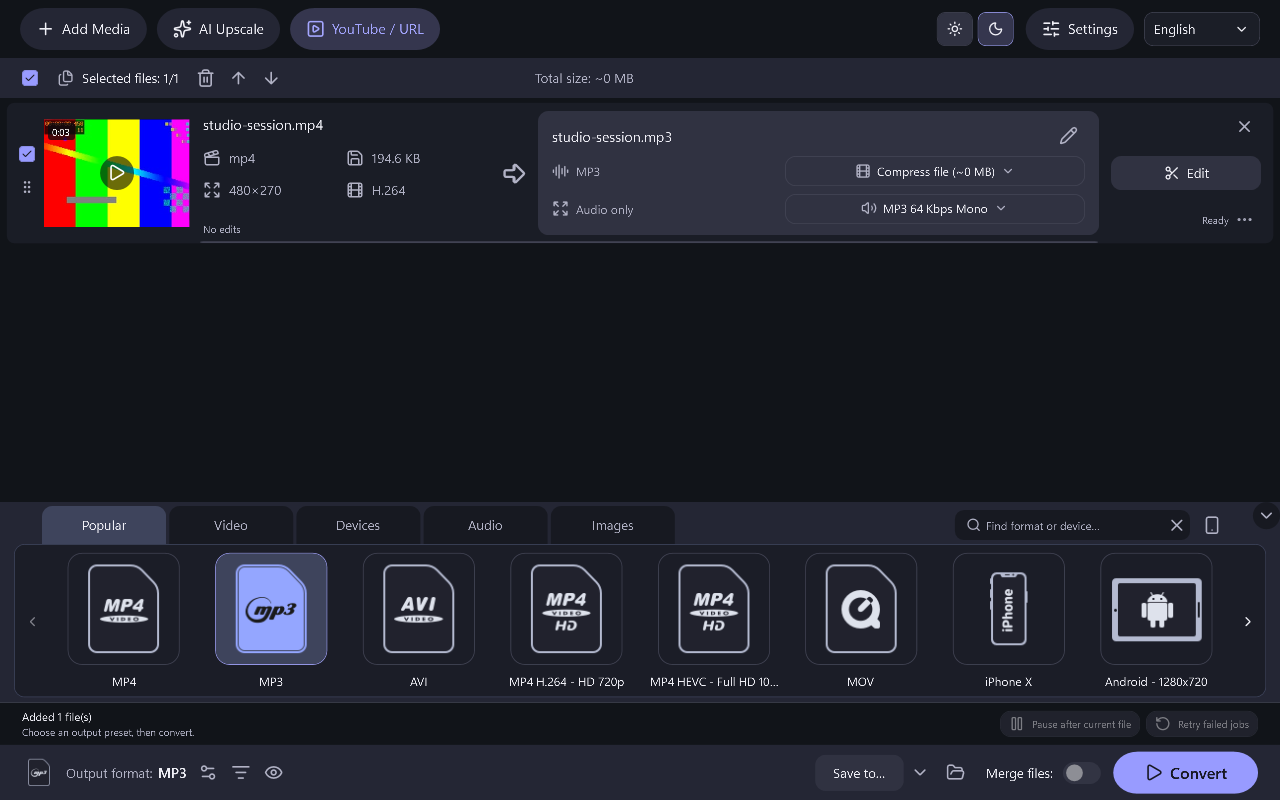
Choose Add video and select the file. Confirm the source appears in the queue, then select its audio track when the recording provides more than one.
- 2
Set the MP3 output
Choose an MP3 preset in the audio formats. Open output settings if you need to change audio bitrate; otherwise begin with the preset and compare a sample.
- 3
Export to your chosen folder
Start conversion and let the queue finish. Play the MP3 in your regular audio player to confirm that the result works outside the converter.
Common Questions
Does choosing 320 kbps improve a poor recording?
It can reduce additional encoding loss, but it cannot restore clipped speech, background detail or frequencies already removed.
Can I convert several videos together?
Yes. Add multiple files to the queue, then check the output format and destination before starting the batch.